Pages
Any eCommerce theme in Webflow is convertible without any structure limitation in terms of number of pages.
The Udesly App automatically understands your page structure and creates the Shopify pages according to your theme.
All static pages are automatically created as static page in Shopify, and all dynamic pages are mapped either as eCommerce pages or Blog pages.
You can slightly modify this behaviour just using a different page slug that you can change in Webflow.
Just as a reminder, the page slug is the user friendly and URL valid name of your page in Webflow. Inside slugs you can not use spaces, accented characters, special characters or uppercase characters. You can modify your page slug, inside page settings under the name Slug
You will find how to define relevant pages in next sections, divided by context, but most of the times you will not need to do any modification to your theme structure, unless you need some specific functions.
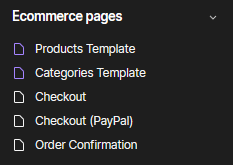
eCommerce pages defined by Webflow
When you enable the eCommerce, Webflow automatically creates some relevant pages that are automatically converted into the corresponding Shopify pages
Products Template
Exactly as in Webflow, this template will be used to show up the single page of all your products of Shopify
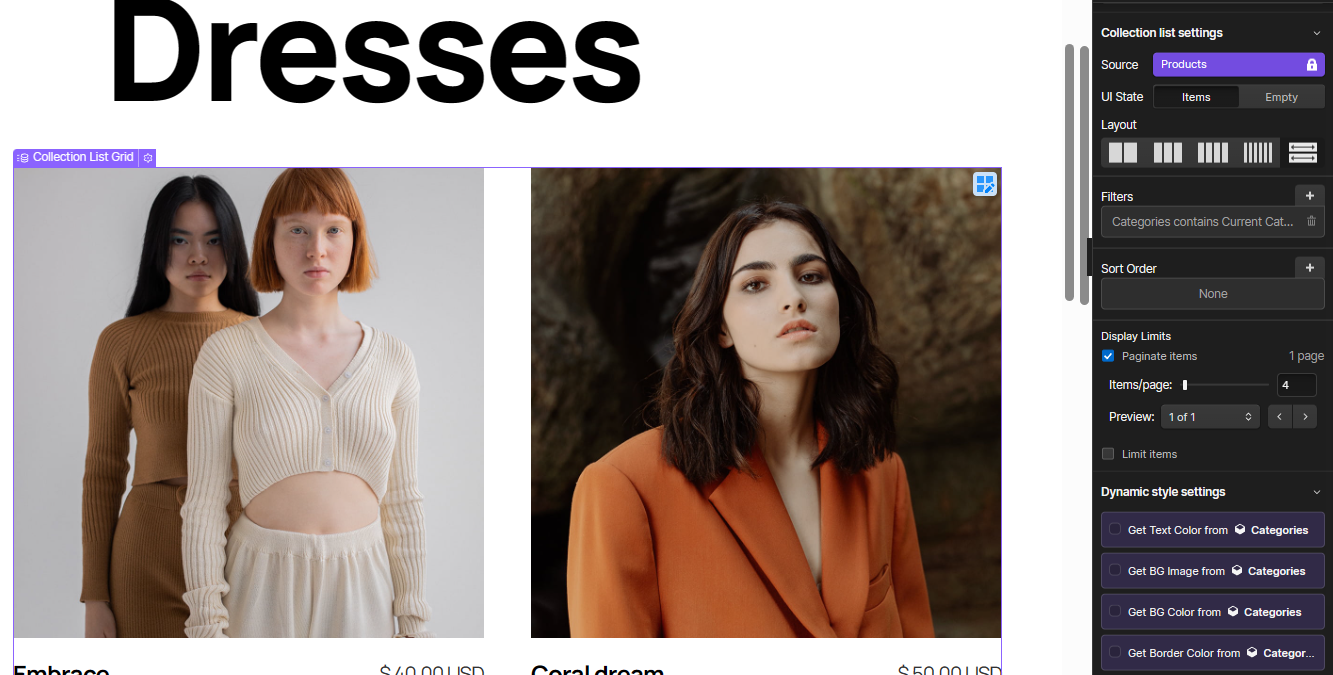
Categories Template
Exactly as in Webflow, this template will be used to show up the page of each category of products of Shopify. Note that in Shopify, a category of product is called Collection, the only difference you will find with Webflow is the url, Shopify urls are not modifiable and each collection will be found at the path /collection/{collection-handle}.
Be sure to add in this page a collection list of products with no sort, filters set as Categories contains Current Category and paginate items enabled, like in the screen below:
Checkout and Paypal Checkout
These pages will be deleted, so do not mind customizing it. Shopify checkout is not customizable, you can only change some settings like logos and colors on the Shopify Customizer
Order Confirmation
This page will be used to show up the details of each order of your customer
Extra eCommerce pages you can create
Cart
Even if is not mandatory, is way better to create a Cart page since it is automatically linked by Shopify from the checkout. To create a cart page in Webflow, you just have to create a static page that has the slug cart
List Collections
This page is typical of Shopify stores and can be found at the url /collections. This page should show up a list of all the Collections of your Store.
To create this page in Webflow just create a static page with the slug list-collections, be sure to add inside a collection list of Product Categories
Gift Card
This is the page that shows up a status of a Gift card issued by your store. It should show up the balance of the Gift card and it’s expiration date for example. This page is accessible only through an email link, so do not try to link up to it. Inside this page you can add all elements that you can find in Gift Card Elements
Shop Page
In Shopify the main shop page can be found both at the urls /products and /collections/all. These urls will both use by default the Categories Template of Webflow. If you want to style this page differently, create a static page in Webflow with the slug collection-all. Be sure to add in this page a collection list of products without any filters and sort order and paginate items enabled.
Alternative Collection Template
If you want to style a specific collection of Shopify in a different way just create a static page with the slug collection-{template name} for example collection-my-template. Once published the new template in Shopify, you will be able to select the different template from the Template selector that you find in each Collection of Shopify. Be sure to add in this page a collection list of Categories of product without any filters and sort order and paginate items enabled.

Alternative Product Template
If you want to style a specific product of Shopify in a different way just create a static page with the slug product-{template name} for example product-my-template. Once published the new template in Shopify, you will be able to select the different template from the Template selector that you find in each Product of Shopify.
To grab dynamic product data be sure to add in this page a collection list of Products with the limit set to 1, and on the collection list item you must add the custom attribute
This attribute will automatically remove the collection list wrapper and leave the collection item linked to the current product of the page
Utility pages
All utility pages are used with same purpose also in Shopify
Password Page
This page will be used if your store is password protected, usefull if you want to prevent the access to your store during development
404 Page
Will be used as 404 also in Shopify
Search Page
Search Page will be used as a page to show all search results. (Shopify searches globally on pages, articles and products)
Blogs Pages
Since in Shopify, actually you can’t create “Custom CMS Collections”, the Udesly App translates all different CMS Collections as different Blogs.
For example if you create a CMS collection called Event in Webflow, you will find all single events inside the url structure /blogs/event/event-slug, and this url will use the page Event Template that you find under CMS Collection Pages.
It’s really adviced to create a CMS collection with slug news since it’s the default Blog created automatically by Shopify.
Blog Page
To create a blog page in Webflow you have to create a static page with slug blog-{cms collection slug}, so for example if your CMS collection has the slug news, your blog static page must have the slug blog-news. In Shopify this page will be found at /blogs/{blog handle}, so for example if the CMS collection has the slug news, your blog page will be found at /blogs/news/. Since in Shopify there are actually different blogs, you can’t link to the blog page directly. To link to the blog page you must use the attribute:
so for example if your cms collection has the slug news, to link to the blog page you must use the attribute:
Article Page
Every page that you can find inside the section CMS Collection Pages, will be converted automatically as an alternative article template. The general article template will be copied up from the first page found under the CMS Collection Pages section, so be sure to add at least one html element (even an empty div) inside each of these pages, otherwise Shopify articles will not work.
User Pages
Webflow user pages are automatically converted as Shopify customer account pages
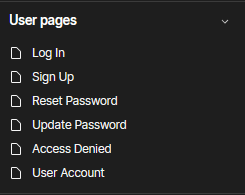
Log In
This page will have the same exact functionality in Shopify, with the only difference that the url will be /customers/login.
Register
This page will have the same exact functionality in Shopify, with the only difference that the url will be /customers/register.
User Account
This page will have the same exact functionality in Shopify, with the only difference that the url will be /customers.
In this page you should remove the default Webflow made elements since they are not compatible with Shopify. Inside this page you should use the elements that you can find at the pages
Account Elements and Orders
Reset Password
This page in Shopify has a slightly different functionality. In Shopify usually the reset password page is used to change up the password and not to ask a new one. Since this difference is in place, this Webflow page is converted as a static page, and its form is used to request a passwords reset.
Update Password
This page will be used as the effective reset password that is accessible only from the email link that you will receive when you request a password reset from the Reset Password page.
Access Denied
Shopify doesn’t have this functionality built-in, so this page will be not converted.
Activate Account
Webflow doesn’t have this functionality, to create an activate account page you have to design a static page with the slug activate and inside this page add an activate account form that you can copy from here. This page is accessible only through email links and is used to create a password only and exclusively when a customer is invited manually from the Shopify backend.
Addresses
Webflow doesn’t have this functionality, to create an addesses account page you have to design a static page with the slug addresses. In this page your customer will be able to modify it’s own addresses or add new one. So be sure to add the forms New Address and Edit Address
Page Templates
Below there are some must pages that you should ALWAYS create in Webflow.
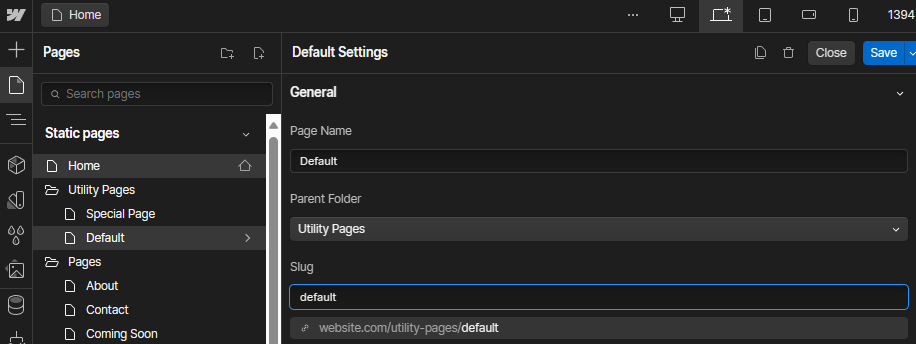
Default Page
This is the page that will be used as template for new pages created directly in Shopify. To create it you must create a static page in Webflow with slug default.
Inside this page you should use all dynamic elements that you find here
Special Page
This page is used by Shopify for app proxies, for the challenge page, and for the policy pages. So it’s basically mandatory.
To create a special page, just create a static page in Webflow with slug special-page.
It’s mandatory in this page to create a simple template with basically just Header and Footer and a richtext in between.
The richtext must have the attribute
Note: the richtext must not be inside a Component